Outlook Office 365
E-mail account management
- Start Outlook.
- Click on “File“ at the top left and then “Add Account“.

→ This will start the e-mail account setup wizard.
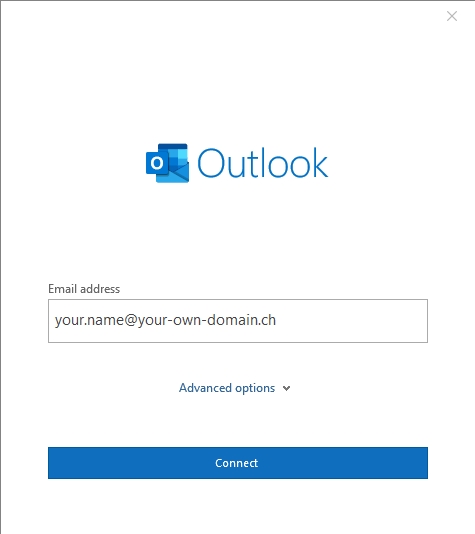
Automatic configuration
- Enter your complete e-mail-address and click on “Connect”.
→ Outlook searches for the correct connection settings. - In the “Password” field, enter the password of your e-mail address that you defined when you created the e-mail-address in Control Panel.
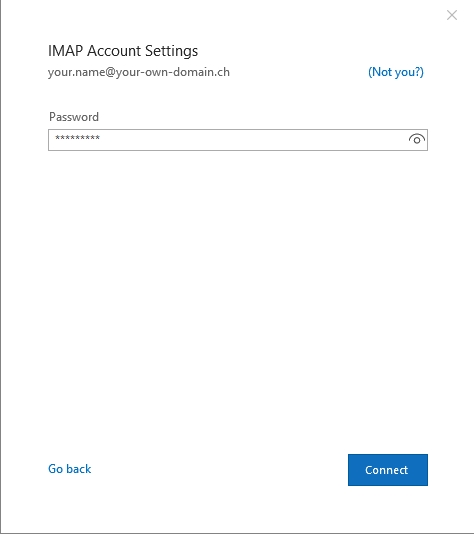
- Click on “Connect” again.
→ If you see the following message, your account has been successfully set up: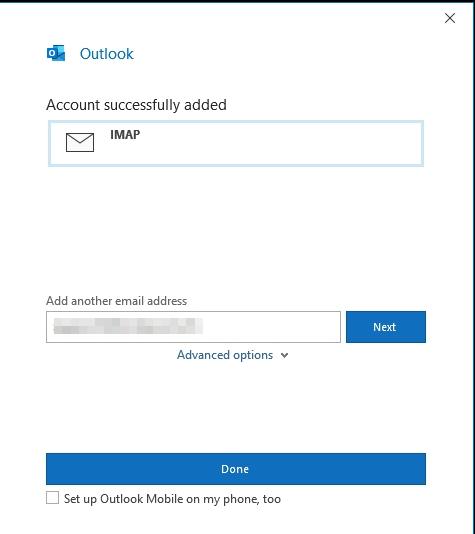
- Click on “Done” to complete the account setup.
→ The e-mail account has been set up. You can now use Outlook to send and receive e-mails with this e-mail address.
Note: If the automatic setup fails and you get a certificate error warning, then you can accept the certificate and your e-mail address will work. The warning appears because our SSL certificates for our e-mail-servers are not specific to your own domain.
Manual configuration
If the automatic configuration fails, you can also set up the e-mail account manually.
To do so, proceed as follows:
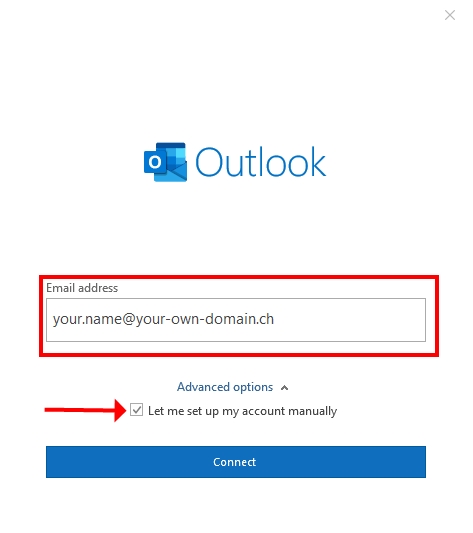
- Enter your complete e-mail address.
- Click on “Advanced options” and activate the “Let me set up my account manually” option.
- Click on “Connect”.
Select account type
- Now select either an IMAP or POP3 account:
- IMAP: by choosing IMAP, your e-mails are stored on the server. Each time you read an e-mail, a copy is downloaded from the server.
- POP3: by choosing POP3, your e-mails are downloaded to and saved on your device. The messages are then deleted from the server. This allows you to read your e-mails at any time, even if you are not connected to the internet.

- In the “Password” field, enter the password of your e-mail address that you defined when you created the e-mail address in Control Panel, and click on “Connect”.

→ If you see the following message, your account has been successfully set up: - Click on “Done” to complete the account setup.
→ The e-mail account has been set up. You can now use Outlook to send and receive e-mails with this e-mail address.
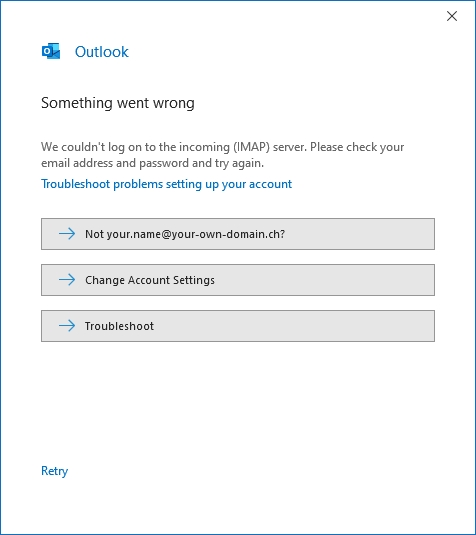
Exceptional case
If you have made a mistake when entering the username (e-mail address) or password, an error message will appear.
In this case, proceed as follows:
- Click on “Change Account Settings”.
- In the account settings, enter the server address mail.yourdomain.com for IMAP or mail.yourdomain.com
- for POP for “Incoming mail”.
- For “Outgoing mail”, enter the server address mail.yourdomain.com
- Select either “STARTTLS” or “SSL/TLS” as the encryption method for both servers.
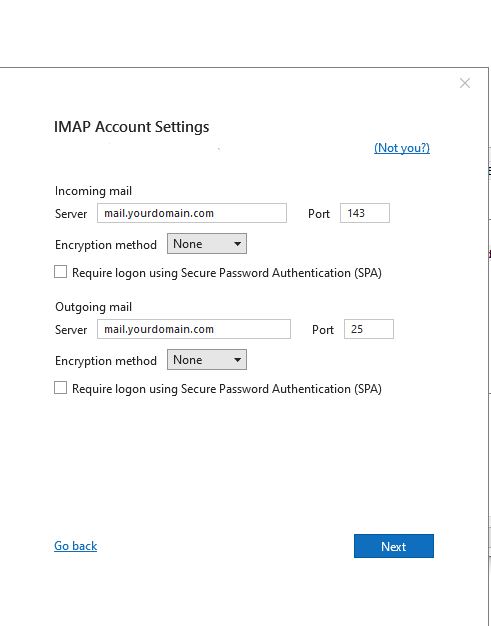
- Verify the port numbers according to the following list:
| Account and connection type | Port |
|---|---|
| IMAP with connection type “SSL” | 993 |
| IMAP with connection type “TLS” | 143 |
| POP with connection type “SSL” | 995 |
| POP with connection type “TLS” | 110 |
| SMTP with connection type “SSL” | 465 |
| SMTP with connection type “TLS” | 587 |
- Click on “Next”.
→ The account settings will be checked. If the account setup was successful, you will see the following message: - Click on “Done” to complete the account setup.
→ The e-mail account has been set up. You can now use Outlook to send and receive e-mails with this e-mail address.